RAI Walkthrough - from zero to a custom agent

Overview
This guide demonstrates how to create and deploy a RAI agent on a ROS 2 enabled robot. You'll learn how to:
- Create a new, custom RAI Agent from scratch
- Implement a platform-specific tool for robot control
- Build a optimized system prompt using rai whoami
- Deploy and interact with the agent
Prerequisites
Before proceeding, ensure you have:
- ROS 2 (humble or jazzy) installed and properly set up
- RAI installed and configured
Creating a Custom Agent
In this section, we'll create a new agent from scratch using the ReAct agent. While pre-built ROS 2-compatible agents exist in RAI, this example will help you understand the underlying architecture and customization options.
The underlying ReAct agent combines language models with a set of tools to solve complex problems. Our Agent implementation adds robot status monitoring, which controls agent execution based on the robot's state.
from typing import List

from langchain_core.runnables import RunnableConfig
from langchain_core.tools import BaseTool
from rai.agents import BaseAgent
from rai.agents.langchain import (
    HRICallbackHandler,
    ReActAgentState,
    create_react_runnable,
)
from rai.communication.ros2 import (
    ROS2Connector,
    ROS2HRIConnector,
    ROS2HRIMessage,
    ROS2Message,
)
from rai.messages.multimodal import SystemMultimodalMessage


class PandaAgent(BaseAgent):
    def __init__(
        self,
        connector: ROS2Connector,
        tools: List[BaseTool],
        system_prompt: SystemMultimodalMessage,
        input_topic: str,
        output_topic: str,
    ):
        super().__init__()
        self.connector = connector

        # Initialize the ROS 2 HRI (Human-Robot Interface) connector
        # This handles bidirectional communication with human-facing topics
        self.hri_connector = ROS2HRIConnector()

        # Create a ReAct agent with the provided tools and system prompt
        self.agent = create_react_runnable(
            tools=tools,
            system_prompt=system_prompt,
        )
        # Initialize the agent's state with an empty message history
        self.state = ReActAgentState(messages=[])

        # Set up the callback handler to route agent outputs to ROS 2 topics
        self.callback_handler = HRICallbackHandler(
            connectors={output_topic: self.hri_connector},
        )

        # Register the input callback for distributed operation
        # For simpler setups, you can directly call self.agent.invoke() in a loop
        self.hri_connector.register_callback(input_topic, self.input_callback)

        # Monitor the robot's status topic to control agent execution
        # The agent will only process messages when the arm is ready
        self.arm_ready = False
        self.connector.register_callback("/panda_status", self.monitor_status_topic)

    def monitor_status_topic(self, msg: ROS2Message):
        """Update the arm readiness status based on the status message."""
        if msg.payload.status == "ready":
            self.arm_ready = True
        else:
            self.arm_ready = False

    def input_callback(self, message: ROS2HRIMessage):
        """Process incoming messages when the arm is ready."""
        if self.arm_ready:
            self.state["messages"].append(message.to_langchain())
            self.agent.invoke(
                self.state, config=RunnableConfig(callbacks=[self.callback_handler])
            )
        else:
            self.logger.warning("Arm is not ready, skipping the message")

    def run(self):
        """Main execution loop for the agent.

        This implementation does not require any background processing, so the method is intentionally left empty.
        """
        pass

    def stop(self):
        """Clean up resources and shut down connections."""
        self.connector.shutdown()
        self.hri_connector.shutdown()
Implementing Platform-Specific Tools
This section demonstrates how to implement a custom tool for safely shutting down the robot arm. The tool showcases how to integrate platform-specific functionality into the RAI framework.
For comprehensive information about tool implementation in RAI, refer to the tools documentation.
from typing import Literal, Type

from pydantic import BaseModel, Field
from rai.communication.ros2 import ROS2Message
from rai.tools.ros2.base import BaseROS2Tool


# Define the input schema for the tool
class ShutdownArmToolInput(BaseModel):
    level: Literal["soft", "hard"] = Field(
        default="soft",
        description="The level of shutdown to perform",
    )


# Define the tool
class ShutdownArmTool(BaseROS2Tool):
    """Tool for safely shutting down the robot arm."""
    name: str = "shutdown_arm"
    description: str = "Shutdown the arm"
    args_schema: Type[ShutdownArmToolInput] = ShutdownArmToolInput

    def _run(self, level: Literal["soft", "hard"]) -> str:
        """Execute the arm shutdown command."""
        response = self.connector.service_call(
            ROS2Message(
                payload={"level": level}
            ),
            target="/panda_arm/shutdown",
            msg_type="rai_interfaces/ShutdownArm",
        )
        if response.payload.success:
            return "Arm shutdown successful"
        else:
            return "Arm shutdown failed"
Building the System Prompt
The rai whoami utility generates a system prompt based on your robot's specifications. It requires
a directory containing:
- Documentation
- Images
- URDF files
Directories are optional
While each directory is optional, providing comprehensive information about your robot will result in a more accurate and effective system prompt.
For extended guide on rai whoami see Create Robot's Whoami
Setting Up the Robot Directory
Create a panda/ directory with the following structure:
-
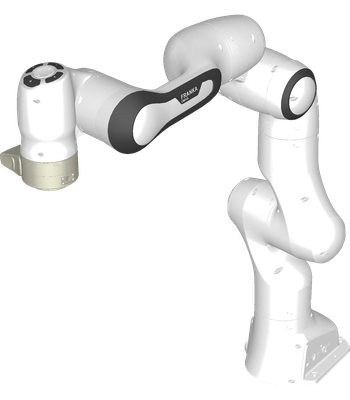
Images
- Save this image in
panda/images
- Save this image in
-
Documentation
- Save
this document
in
panda/documentation
- Save
this document
in
-
URDF
- Save
this URDF
in
panda/urdf
- Save
this URDF
in
Building the Whoami
Run the following command to build the whoami:
python src/rai_whoami/rai_whoami/build_whoami.py panda/ --build-vector-db
Running the Agent
from rai_whoami.models import EmbodimentInfo
from rai.agents import wait_for_shutdown
from rai.communication.ros2 import ROS2Context, ROS2Connector
from rai.tools.ros2 import ROS2Toolkit


@ROS2Context()  # Initializes ROS 2 context and ensures proper cleanup on exit
def main():
    # Load the robot's embodiment information from the whoami directory
    whoami = EmbodimentInfo.from_directory("panda/")
    connector = ROS2Connector()

    # Initialize tools with ROS 2 communication capabilities
    # BaseROS2Tools require a ROS2Connector instance for communication
    tools = [
        ShutdownArmTool(connector=connector),
        *ROS2Toolkit(connector=connector).get_tools(),
    ]

    # Create and configure the agent with all necessary components
    agent = PandaAgent(
        connector=connector,
        tools=tools,
        system_prompt=whoami.to_langchain(),
        input_topic="/from_human",
        output_topic="/to_human",
    )

    # Start the agent and wait for shutdown signal (Ctrl+C)
    wait_for_shutdown([agent])

if __name__ == "__main__":
    main()
Communicating with the Agent
The agent exposes two main communication channels:
-
Sending Commands
ros2 topic pub /from_human rai_interfaces/msg/HRIMessage "{\"text\": \"Move the arm to 0, 0, 0?\"}" -
Receiving Responses
ros2 topic echo /to_human rai_interfaces/msg/HRIMessage